
Introduction
There’s something magical about a perfectly creamy, dreamy cheesecake that melts in your mouth with every bite. This No-Bake Cheesecake captures that same luxurious texture and rich flavor without ever turning on your oven. Imagine a dessert with a buttery graham cracker crust, a silky-smooth filling that’s perfectly sweetened, and a light, airy texture that makes every forkful feel like a special treat. Whether you’re a seasoned baker or a complete beginner, this no-bake version is foolproof and incredibly satisfying. It’s the ideal dessert for hot summer days, busy holidays, or any time you’re craving something sweet but want to keep things simple.
Prep Time, Cook Time, and Servings
Prep Time: 20 minutes | Chill Time: 4 hours | Total Time: 4 hours 20 minutes | Servings: 8-10 slices
Ingredients
- 1 1/2 cups graham cracker crumbs (about 12 full sheets)
- 1/3 cup unsalted butter, melted
- 1/4 cup granulated sugar
- 16 oz cream cheese, softened to room temperature
- 1 cup powdered sugar
- 1 teaspoon vanilla extract
- 1 1/2 cups heavy whipping cream, chilled
- 2 tablespoons granulated sugar (for whipped cream)
Instructions
- Prepare the Crust: In a medium bowl, combine graham cracker crumbs, melted butter, and 1/4 cup granulated sugar. Mix until the mixture resembles wet sand and holds together when pressed. Press firmly into the bottom and up the sides of a 9-inch springform pan or pie dish. Use the bottom of a measuring cup to compact the crust evenly. Refrigerate while preparing the filling.
- Make the Filling: In a large mixing bowl, beat the softened cream cheese with an electric mixer on medium speed until completely smooth and creamy, about 2-3 minutes. Scrape down the sides of the bowl as needed.
- Add Sugar and Vanilla: Add the powdered sugar and vanilla extract to the cream cheese. Beat on low speed until combined, then increase to medium-high speed and beat until the mixture is light and fluffy, about 2 minutes.
- Whip the Cream: In a separate chilled bowl, pour the heavy whipping cream and add 2 tablespoons granulated sugar. Beat with clean beaters on high speed until stiff peaks form, about 3-4 minutes. The cream should hold its shape when the beaters are lifted.
- Fold Cream into Cream Cheese: Add about one-third of the whipped cream to the cream cheese mixture. Gently fold using a rubber spatula until just combined. Add the remaining whipped cream in two more additions, folding gently each time until no streaks remain. Be careful not to deflate the mixture.
- Assemble the Cheesecake: Remove the crust from the refrigerator. Pour the filling into the prepared crust and spread it evenly with an offset spatula. Smooth the top completely.
- Chill: Cover the cheesecake with plastic wrap and refrigerate for at least 4 hours, or preferably overnight. This allows the filling to set properly and develop the perfect creamy texture.
- Serve: Before serving, run a thin knife around the edge of the springform pan to loosen the cheesecake. Remove the outer ring. Slice with a sharp knife dipped in hot water for clean cuts. Serve chilled.
Pro Tips for Perfect No-Bake Cheesecake
- Use Room Temperature Cream Cheese: Cold cream cheese will create lumps in your filling. Let it sit at room temperature for at least 1-2 hours before mixing for the smoothest results.
- Don’t Overmix the Whipped Cream: Overbeating can cause the cream to become grainy or separate. Stop when you see stiff peaks that hold their shape.
- Chill Long Enough: Four hours is the minimum, but overnight chilling produces the best texture and flavor development.
- Press Crust Firmly: A well-compacted crust prevents crumbling when slicing. Use the bottom of a glass or measuring cup for even pressure.
- Clean Knife Between Slices: Dip your knife in hot water and wipe it clean between each cut for picture-perfect slices.
Variations and Substitutions
- Lemon No-Bake Cheesecake: Add 2 tablespoons fresh lemon juice and 1 tablespoon lemon zest to the filling for a bright, citrusy twist.
- Chocolate No-Bake Cheesecake: Fold in 1/2 cup melted and cooled chocolate chips or cocoa powder for a rich chocolate version.
- Healthier Option: Use reduced-fat cream cheese and substitute half the powdered sugar with a natural sweetener like monk fruit or stevia.
- Graham Cracker Alternatives: Try crushed digestive biscuits, vanilla wafers, or even chocolate cookies for different crust flavors.
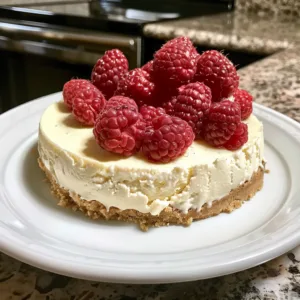
- Fruit Toppings: Top with fresh berries, cherry pie filling, or a homemade fruit compote for added flavor and visual appeal.
Storage and Reheating Tips
Store your No-Bake Cheesecake covered in the refrigerator for up to 5 days. Keep it in the springform pan with plastic wrap pressed directly on the surface to prevent it from absorbing other flavors. For longer storage, you can freeze the cheesecake (without toppings) for up to 2 months. Wrap it tightly in plastic wrap, then aluminum foil. Thaw overnight in the refrigerator before serving. This dessert is meant to be served cold, so there’s no need to reheat it. In fact, keeping it chilled is essential for maintaining its perfect creamy texture.
Frequently Asked Questions
Can I make this cheesecake ahead of time?
Absolutely! This is one of the best make-ahead desserts. You can prepare it up to 2 days in advance and keep it refrigerated until ready to serve.
Why did my cheesecake turn out runny?
Runny cheesecake usually means it wasn’t chilled long enough or the cream wasn’t whipped to stiff peaks. Make sure to chill for at least 4 hours and whip the cream until it holds its shape firmly.
Can I use store-bought whipped topping instead of fresh whipped cream?
Yes, you can substitute 1 1/2 cups of thawed whipped topping (like Cool Whip) for the homemade whipped cream. The texture will be slightly different but still delicious.
How do I prevent cracks in my no-bake cheesecake?
No-bake cheesecakes don’t typically crack like baked ones do. The key is gentle folding of the whipped cream and proper chilling time.
Can I use a different size pan?
Yes! You can use an 8-inch pan for a taller cheesecake or a 10-inch pan for a thinner one. Adjust chilling time if needed – larger pans may set slightly faster.
Nutrition Information (per serving)
Approximately 420 calories, 5g protein, 32g carbohydrates, 30g fat. This is an estimate and will vary based on specific ingredients used and portion sizes.
Conclusion
This No-Bake Cheesecake proves that you don’t need an oven to create an impressive, restaurant-quality dessert. With its buttery graham cracker crust, silky smooth filling, and endless customization options, it’s a recipe that belongs in every home cook’s collection. The beauty of this dessert lies in its simplicity – just a few quality ingredients transformed through proper technique into something truly special. Whether you’re serving it at a dinner party, bringing it to a potluck, or simply treating yourself to a slice of heaven, this no-bake cheesecake delivers every time. The hardest part is waiting those 4 hours for it to chill, but trust me, the creamy, dreamy results are absolutely worth it. Happy no-baking!
No-Bake Cheesecake
Ingredients
For the crust
- 1 1/2 cups graham cracker crumbs (about 12 full sheets)
- 1/3 cup unsalted butter, melted
- 1/4 cup granulated sugar
For the filling
- 16 oz cream cheese, softened to room temperature
- 1 cup powdered sugar
- 1 teaspoon vanilla extract
- 1 1/2 cups heavy whipping cream, chilled
- 2 tablespoons granulated sugar (for whipped cream)
Instructions
Preparation of Crust
- In a medium bowl, combine graham cracker crumbs, melted butter, and 1/4 cup granulated sugar. Mix until the mixture resembles wet sand and holds together when pressed.
- Press firmly into the bottom and up the sides of a 9-inch springform pan or pie dish. Use the bottom of a measuring cup to compact the crust evenly.
- Refrigerate while preparing the filling.
Make the Filling
- In a large mixing bowl, beat the softened cream cheese with an electric mixer on medium speed until completely smooth and creamy, about 2-3 minutes. Scrape down the sides of the bowl as needed.
- Add the powdered sugar and vanilla extract to the cream cheese. Beat on low speed until combined, then increase to medium-high speed and beat until the mixture is light and fluffy, about 2 minutes.
Whip the Cream
- In a separate chilled bowl, pour the heavy whipping cream and add 2 tablespoons granulated sugar. Beat with clean beaters on high speed until stiff peaks form, about 3-4 minutes.
- The cream should hold its shape when the beaters are lifted.
Combine Components
- Add about one-third of the whipped cream to the cream cheese mixture. Gently fold using a rubber spatula until just combined.
- Add the remaining whipped cream in two more additions, folding gently each time until no streaks remain. Be careful not to deflate the mixture.
Assemble the Cheesecake
- Remove the crust from the refrigerator. Pour the filling into the prepared crust and spread it evenly with an offset spatula. Smooth the top completely.
Chill
- Cover the cheesecake with plastic wrap and refrigerate for at least 4 hours, or preferably overnight.
Serve
- Before serving, run a thin knife around the edge of the springform pan to loosen the cheesecake. Remove the outer ring.
- Slice with a sharp knife dipped in hot water for clean cuts. Serve chilled.
