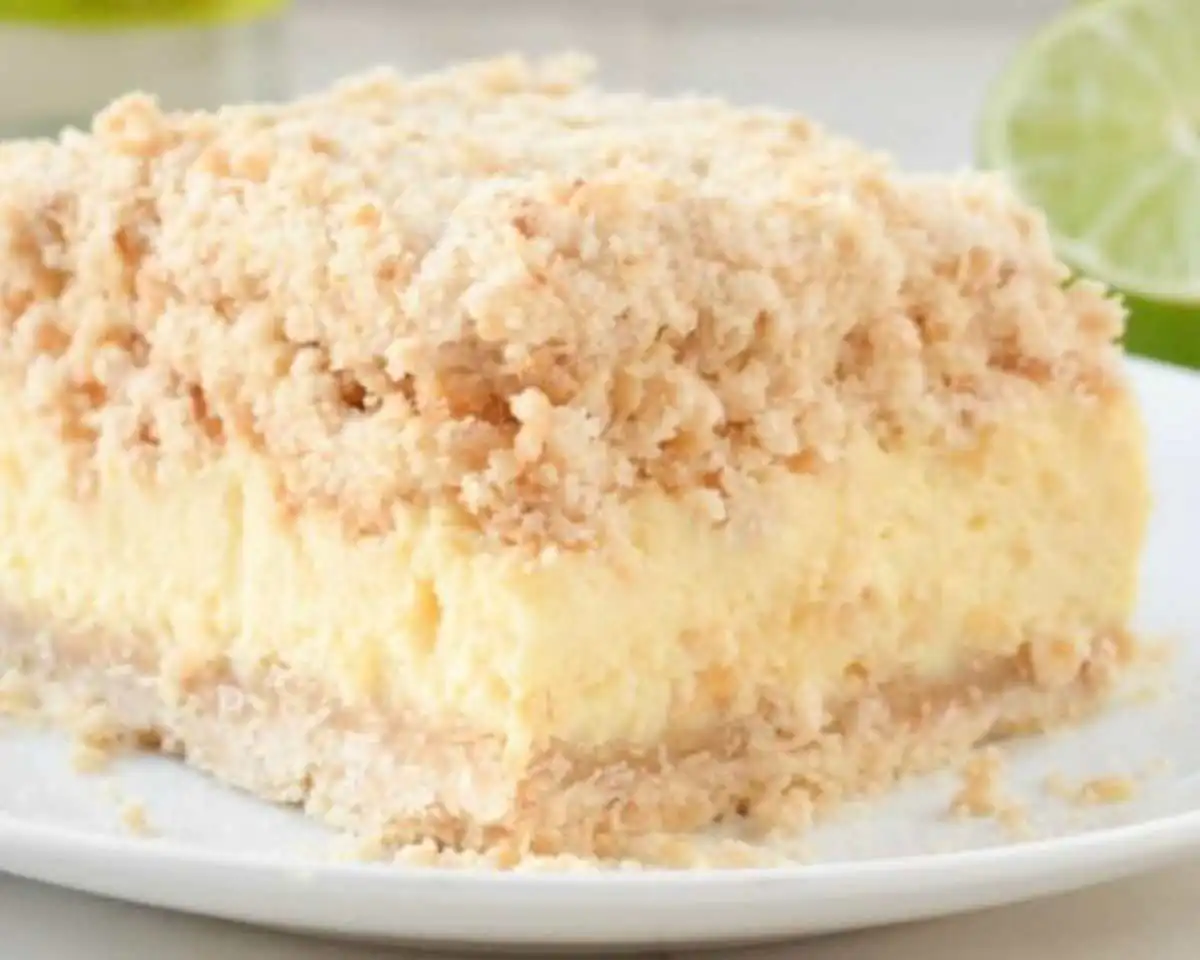
In the realm of delightful desserts, Key Lime Cheesecake Crumb Bars stand out as a zesty and indulgent treat. Combining the richness of cheesecake with the vibrant flavor of key limes, these bars are a perfect harmony of sweet and tangy. In this article, we’ll delve into the step-by-step process of creating these heavenly bars that are sure to elevate your dessert game.
Creating Key Lime Cheesecake Crumb Bars: A Culinary Journey
Now, let’s embark on the flavorful journey of crafting Key Lime Cheesecake Crumb Bars. Begin by preheating your oven to 350F (175C) and prepare an 8×8-inch baking pan by greasing and lining it with parchment paper, leaving some overhang for easy removal.
1. Gathering the Essentials
1.1 Ingredients Overview
To achieve the perfect balance of flavors, gather the essential ingredients for both the crumb base and the key lime cheesecake filling. Quality ingredients lay the foundation for a delectable dessert.
1.2 Importance of Quality Ingredients
Using fresh and high-quality ingredients ensures the authenticity of flavors, elevating your crumb bars to a gourmet level. From cream cheese to key lime juice, every component plays a crucial role in the symphony of tastes.
2. Building the Foundation: Crumb Base Creation
2.1 Flour, Sugar, and Melted Butter
In a bowl, combine 1 and 1/2 cups of all-purpose flour, 1/2 cup of granulated sugar, and melted butter to create the crumbly base. The right proportions and thorough mixing are key to achieving the desired texture.
2.2 Achieving the Perfect Crumbly Texture
Ensure the crumb mixture attains a texture that can be easily pressed into the pan. The crumb base sets the stage for the layers of flavor that follow.
2.3 Importance of Proper Base Pressing Techniques
Press the crumb mixture evenly into the bottom of the prepared pan. Pay attention to uniformity, as this will contribute to the overall mouthfeel of the bars.
3. Mastering the Cheesecake Filling
3.1 Cream Cheese and Sugar Bliss
In a separate bowl, beat 16 oz of softened cream cheese and 1/2 cup of granulated sugar until the mixture is smooth and creamy. This forms the luscious foundation of the cheesecake layer.
3.2 The Magic of Eggs in Cheesecake
Add 2 large eggs to the cream cheese and sugar mixture. The eggs contribute to the creamy texture and binding of the cheesecake.
3.3 Key Lime Juice: The Star Ingredient
Introduce 1/3 cup of freshly squeezed key lime juice to infuse the filling with the distinctive tanginess of key limes. The fresh and vibrant flavor is unparalleled.
3.4 Zest and Color: Enhancing the Aesthetics
Include 1 teaspoon of grated lime zest for an aromatic lift. For a visually appealing touch, add green food coloring (optional).
4. Assembling the Symphony: Crumb Base meets Cheesecake Filling
4.1 Ensuring Even Distribution
Pour the prepared cheesecake filling over the crumb base, ensuring an even distribution. This step is crucial for a harmonious blend of flavors in every bite.
4.2 The Art of Pouring and Spreading
Master the art of pouring and spreading to create a visually stunning layer that complements the crumb base. Precision at this stage contributes to the bars’ overall aesthetic appeal.
5. Baking Perfection: The Crucial 25-30 Minutes
5.1 Oven Preheating and Pan Preparation
Place the pan in the preheated oven and bake for 25-30 minutes. Monitor the edges for a set appearance while maintaining a slightly jiggly center.
5.2 Understanding Set Edges and Slightly Jiggly Centers
The edges should have a firm set, indicating doneness, while the center remains slightly jiggly. This balance ensures a creamy texture upon cooling.
6. Cooling and Chilling: The Patience Pays Off
6.1 Room Temperature Cooling
Once out of the oven, let the bars cool to room temperature. This gradual cooling process contributes to the texture and flavor development.
6.2 Refrigeration Magic for Flavor Fusion
Refrigerate the bars for at least 2 hours, allowing the flavors to meld and the texture to set. Patience at this stage rewards you with a dessert that’s both refreshing and satisfying.
7. Unveiling the Culinary Masterpiece: Cutting and Serving
7.1 Parchment Paper Overhang for Easy Removal
Use the parchment paper overhang to easily lift the bars from the pan. This ensures a clean and efficient removal process.
7.2 Precision in Cutting for Aesthetic Appeal
Take the time to cut the bars with precision. Aesthetically pleasing servings enhance the overall dining experience.
Conclusion: Indulge in the Creamy and Tangy Delight!
In conclusion, the Key Lime Cheesecake Crumb Bars offer a delightful fusion of textures and flavors. The crumbly base
provides the perfect contrast to the creamy cheesecake filling, while the key lime essence adds a refreshing zing. Treat yourself and your loved ones to this culinary masterpiece – a perfect finale to any meal!
FAQs: Your Key Lime Cheesecake Crumb Bars Queries Answered!
- Can I use regular lime juice instead of key lime juice?
- While regular lime juice can be used, the unique flavor of key limes adds an exceptional touch to the bars.
- Is green food coloring necessary for the filling?
- It’s optional, but it adds a vibrant visual appeal to the bars. Feel free to omit it if you prefer a more natural look.
- Can I freeze Key Lime Cheesecake Crumb Bars for later?
- Yes, these bars freeze well. Ensure proper wrapping to maintain their freshness.
- What can I serve alongside these bars for a complete dessert experience?
- Whipped cream or a scoop of vanilla ice cream complements the bars perfectly.
- Can I make these bars in advance for an event?
- Absolutely! Prepare them a day ahead, refrigerate, and enjoy the convenience of a pre-made dessert.

Key Lime Cheesecake Crumb Bars
Ingredients
For the Crumb Base
- 1.5 cups all-purpose flour Use quality flour for best texture.
- 0.5 cups granulated sugar
- 0.5 cups melted butter Melted for easy mixing.
For the Cheesecake Filling
- 16 oz cream cheese, softened Ensure it's at room temperature for easy blending.
- 0.5 cups granulated sugar
- 2 large eggs Adds creaminess and structure.
- 1/3 cups freshly squeezed key lime juice Fresh key lime juice preferred for authentic flavor.
- 1 teaspoon grated lime zest Enhances aroma and flavor.
- 1 drop green food coloring Optional for visual appeal.
Instructions
Preparation
- Preheat your oven to 350F (175C) and grease an 8×8-inch baking pan, lining it with parchment paper for easy removal.
Make the Crumb Base
- In a bowl, combine flour, sugar, and melted butter to create the crumbly mixture.
- Press the mixture evenly into the bottom of the prepared baking pan.
Prepare the Cheesecake Filling
- In a separate bowl, beat the softened cream cheese and sugar until smooth and creamy.
- Add the eggs, mixing until just combined.
- Stir in the key lime juice and lime zest, mixing until well incorporated.
- Optional: Add food coloring for a vibrant look.
Assemble and Bake
- Pour the cheesecake filling over the crumb base, spreading it evenly.
- Bake in the preheated oven for 25-30 minutes, until the edges are set and the center is slightly jiggly.
Cool and Chill
- Allow the bars to cool to room temperature.
- Refrigerate for at least 2 hours before slicing.
Serve
- Use the overhanging parchment paper to lift the bars from the pan for easy slicing.
- Cut the bars into squares and serve.
Notes

Key Lime Cheesecake Crumb Bars
Ingredients
Crumb Base
- 1.5 cups all-purpose flour Sifted for better texture
- 0.5 cups granulated sugar
- 0.5 cups melted butter Unsalted
Cheesecake Filling
- 16 oz softened cream cheese Make sure it's softened for easy mixing
- 0.5 cups granulated sugar
- 2 large eggs Bring to room temperature for better mixing
- 1/3 cups freshly squeezed key lime juice Freshly squeezed for the best flavor
- 1 teaspoon grated lime zest Adds aromatic lift
- 1 drop green food coloring Optional for color enhancement
Instructions
Preparation
- Preheat your oven to 350F (175C) and prepare an 8×8-inch baking pan by greasing and lining it with parchment paper.
Making the Crumb Base
- In a bowl, combine the all-purpose flour, granulated sugar, and melted butter to create the crumbly base.
- Press the crumb mixture evenly into the bottom of the prepared pan.
Preparing the Cheesecake Filling
- In a separate bowl, beat the softened cream cheese and granulated sugar until smooth and creamy.
- Add the eggs to the mixture and combine until well integrated.
- Stir in the key lime juice and grated lime zest.
- Add green food coloring if desired.
Combining Layers
- Pour the cheesecake filling over the crumb base evenly.
Baking
- Bake in the preheated oven for 25-30 minutes until the edges are set and the center is slightly jiggly.
Cooling
- Let the bars cool to room temperature and then refrigerate for at least 2 hours.
Serving
- Remove the bars using the parchment paper overhang and cut them into pieces for serving.


